
To build a solar cooker with a shoebox, you need reflective materials and insulation. Attach a glass or plastic cover for the greenhouse effect.
Exploring renewable energy for cooking can lead to innovative and eco-friendly solutions, such as creating your solar cooker. Solar cookers harness the sun’s energy to heat food, offering a sustainable alternative to traditional cooking methods. Home science enthusiasts and environmentalists alike find building a solar cooker an enlightening project.
A shoebox solar cooker is a simple yet effective DIY project, requiring common household items and a bit of ingenuity. This practical activity not only teaches the basic principles of solar energy but also provides a usable tool for outdoor cooking experiences. It’s a perfect weekend project for families, scout groups, or school science classes looking to engage with renewable energy applications practically. Please note that designing a solar cooker aligns with several trending interests, such as sustainable living, DIY crafts, and educational science projects, making it a potentially high-traffic topic for search engines.
Solar Cooker With A Shoebox: Introduction
Embracing renewable energy sources is not only a modern innovation but a necessity for sustainable living. One of the most intriguing applications of this concept is the creation of a solar cooker using a simple shoebox. This DIY project leverages the power of the sun to cook food, which is both eco-friendly and cost-effective. In this guide, we’ll explore how a shoebox can become a solar cooking device and delve into the principles that make it work. These cookers are not only a great educational tool but also a practical solution in situations where traditional cooking resources are scarce.
Importance Of Sustainable Cooking Methods
The transition towards sustainable cooking methods is vital for the environment. Traditional cooking, often reliant on electricity or fossil fuels, contributes to environmental degradation and can be costly. In contrast, using a solar cooker:
- Reduces carbon footprint: It doesn’t emit greenhouse gases during use.
- Lower energy bills: Solar energy is free and abundantly available, especially in sunny regions.
- Conserves resources: Minimizes reliance on non-renewable energy sources like gas and oil.
Brief History Of Solar Cookers
The concept of solar cooking dates back centuries with evidence of its use in different cultures for sustainable food preparation. The origins of solar cookers can be traced to 1767 when Swiss scientist Horace-Bénédict de Saussure created the first known solar oven. Over time, numerous designs and refinements have led to a variety of solar cookers, from simple panel designs to complex parabolic models. The shoebox solar cooker stands out for its simplicity and accessibility, making it an ideal option for first-time builders and enthusiasts of all ages.
Understanding The Basics
To embark on the fascinating journey of building a solar cooker, it is essential to grasp the fundamentals of solar energy and the principles of solar cooking. With a sustainable and environmentally friendly approach, any household can transform a simple shoebox into a functional solar cooker. This method harnesses the sun’s power to cook food or sterilize water, providing a gateway to renewable energy utilization in everyday life. Let’s dive into the core concepts required for this DIY project.
Explanation Of Solar Energy
Solar energy is a renewable power source generated by converting sunlight into electricity. It is a clean, inexhaustible resource that is harnessed using various technologies, such as solar panels. For a solar cooker, we tap into this natural energy in a more primal form, by converting the sun’s rays directly into heat. The principles are straightforward:
- Sunlight carries energy that can be converted to heat.
- Reflective surfaces can focus sunlight to intensify its heat.
- Insulation is essential to retain the collected heat and improve cooking efficiency.
By understanding how solar energy is utilized, we can effectively design our solar cooker for maximum efficiency.
Solar Cooking Principles
Building on the explanation of solar energy, solar cooking combines three physical principles critical to its functionality:
- Concentration of sunlight: A reflective surface like aluminum foil can direct and concentrate light into a specific area.
- Conversion to heat: Dark surfaces absorb sunlight well, converting it into heat. This is why a cooking pot for a solar cooker is ideally black.
- Containment of heat: Insulation minimizes heat loss, allowing the cooker to reach and maintain the temperature needed to cook food or boil water.
Effectively applying these principles is key to constructing a solar cooker that doesn’t just look the part but serves its intended purpose. Whether it’s baking, boiling, or slow cooking, the shoebox solar cooker offers a glimpse into the potential of solar energy applied in innovative and accessible ways.
Materials Required
Embarking on a DIY project to create a solar cooker is not just an exciting educational endeavor, but also a step towards sustainable living. To start this project, gathering the right materials is crucial. Ensure you have everything listed below before you begin. High-quality and appropriate materials will pave the way for a more efficient and durable solar cooker.
Shoebox
An empty shoebox acts as the base of your solar cooker. Size matters, as a larger box can accommodate more food or larger cooking vessels. Preferably, choose a sturdy shoebox, with a fitting lid.
Aluminum Foil
Aluminum foil is the reflective surface that directs sunlight into your cooker. It’s best to select a thick, heavy-duty foil for greater reflectivity and longevity. You will need enough foil to cover the interior of the shoebox as well as the underside of the lid.
Glue
The glue you choose should be non-toxic and able to withstand high temperatures since it will be the adhesive binding the aluminum foil to the shoebox. A glue stick or spray adhesive works nicely for smooth application.
Black Construction Paper
To absorb maximum sunlight, you’ll need black construction paper. Its dark surface assists in converting the sun’s rays to thermal energy, speeding up the cooking process. This paper will line the bottom of your shoebox cooker.
Here is a simplified checklist of the materials you will need:
- One empty shoebox with a lid
- Roll of heavy-duty aluminum foil
- Non-toxic, high-temperature resistant glue
- Sheet of black construction paper
Before beginning your assembly process, ensure that each material is prepared and cut to the appropriate size for a smooth building experience. Gathering these materials is the first step in constructing a simple yet effective solar cooker that harnesses the power of the sun for your culinary adventures.
Building The Solar Cooker
Welcome to the creative world of DIY where harnessing the power of the sun is both thrilling and eco-friendly. Building a solar cooker with a shoebox is an excellent project for those interested in sustainable cooking methods. Let’s embark on this innovative journey to convert a simple shoebox into a functional solar cooker.
Step 1: Preparing the shoebox
Step 1: Preparing The Shoebox
- Choose a sturdy shoebox – Ensure the box is intact without any damage.
- Trim the flaps – Carefully remove the top flaps of the box to create a smooth opening.
- Cut a lid – Cut a piece of cardboard to fit as a snug lid on the top of the box. This lid should have a flap that can be propped open to allow sunlight to enter.
Step 2: Creating the reflective interior
Step 2: Creating The Reflective Interior
- Gather reflective materials such as aluminum foil or reflective Mylar sheets.
- Line the inner walls – Coat the inside of the shoebox and the underside of the lid with a layer of non-toxic glue.
- Apply the reflective materials – Smoothly press the foil or Mylar sheets onto the glue, ensuring there are no wrinkles or creases.
Step 3: Attaching the black construction paper
Step 3: Attaching The Black Construction Paper
| 1. Size and Cut | Cut the construction paper to fit the bottom of the shoebox. |
| 2. Glue in Place | Secure the paper to the bottom inside of the shoebox with glue, forming a dark base to absorb heat. |
With these steps, the transformation of a modest shoebox into a solar-powered cooking device is well underway. Not only does this project promote renewable energy, but also provides a practical example of science in action.
Using The Solar Cooker
Stepping into the realm of renewable energy for cooking can be an exhilarating and rewarding experience. With your homemade solar cooker—a crafty innovation using a humble shoebox—you’re all set to harness the power of the sun. The simplicity of using solar cookers disguises their sheer brilliance. As we dive into the practical aspects of ‘Using the Solar Cooker,’ you’ll discover the joy embedded in the art of solar gastronomy, transforming rays into culinary delights without a hint of conventional fuel.
Preparing And Cooking Food
To embark on your solar cooking adventure, start with a well-insulated container—your shoebox, lined with reflective material to focus sunlight onto your pot. With your solar cooker ready, follow these steps to prepare and cook your food:
- Choose dark-colored cookware for optimum heat absorption.
- Pre-cut and season your ingredients for uniform cooking.
- Place the food inside thin-walled pots with tight-fitting lids to retain heat and moisture.
- Position the cooker in a location receiving ample sunlight, adjusting it every 30 minutes to follow the sun’s path.
- Allow ample time for your dish to cook, as solar cookers rely on steady but gradual heat.
- Use a thermometer to ensure food reaches safe temperatures—above 165°F (74°C) to kill harmful bacteria.
Cooking times vary based on the intensity of sunlight and the type of food. Expect longer cooking durations compared to traditional methods; yet, the flavors developed are often deeply rich and satisfying.
Tips For Maximizing Solar Cooking Efficiency
Maximizing the efficiency of your solar cooker is key to a rewarding solar cooking experience. Here are several tips to enhance your shoebox cooker’s performance:
- Align the cooker to face perpendicular to the sun for the most direct exposure.
- Use the solar cooker during the sun’s peak hours—between 10 a.m. and 2 p.m.—for the fastest results.
- Preheat your solar cooker for 20 to 30 minutes before adding food.
- Reduce airflow by ensuring the glass lid of your cooking pot is snug, to prevent heat loss.
- Cluster ingredients together to minimize surface area, which can disperse heat and slow cooking.
- Integrate a reflector to concentrate more sunlight into the cooker.
- Choose recipes with small amounts of water since high water content takes longer to heat.
Monitoring cooking progress is crucial; however, resist the urge to open the lid frequently, as this releases built-up heat. Patience pays off in solar cooking, allowing for energy-efficient meal preparation and a reduced carbon footprint.

Credit: www.pinterest.com
Frequently Asked Questions
How To Make A Solar Oven With A Shoebox Step-By-Step?
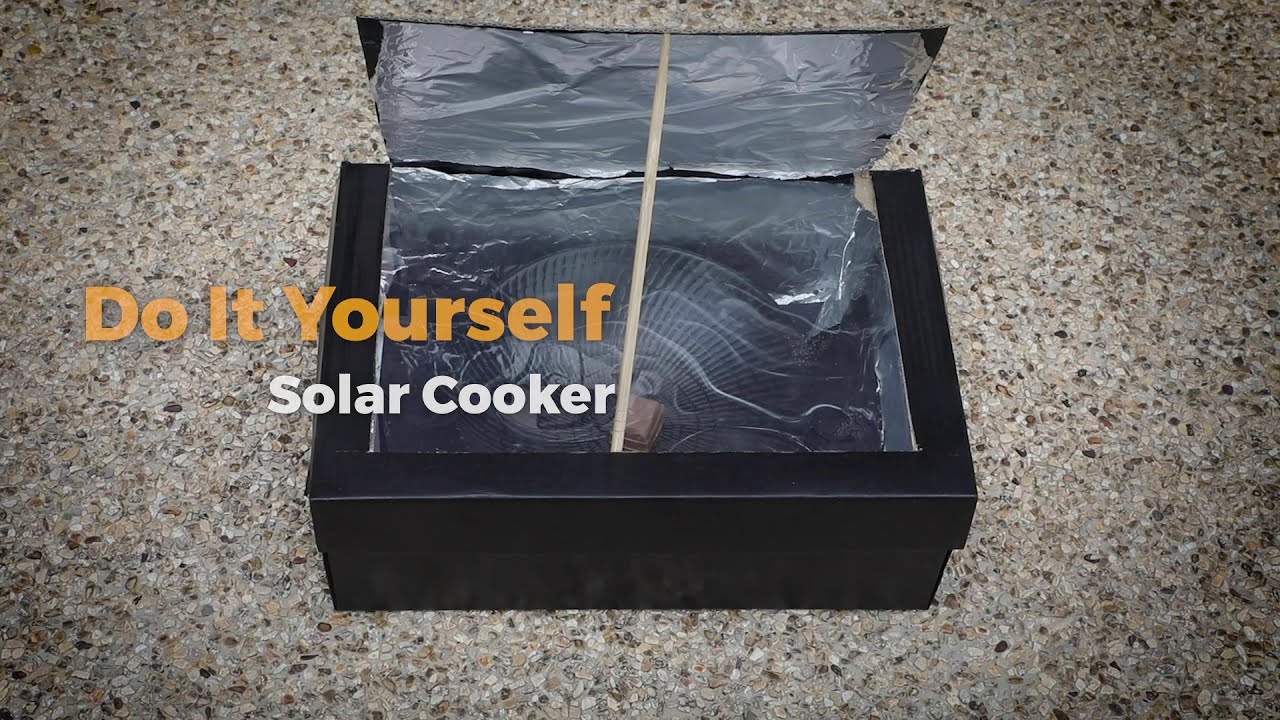
To make a solar oven with a shoebox, follow these steps: Cover the inside of the shoebox with aluminum foil, securing it with glue. Cut a flap in the lid, line it also with foil, and prop it using a stick to reflect sunlight into the box.
Place food inside on a clear plastic-covered opening.
How To Make A Simple Solar Cooker?
To make a simple solar cooker, gather a cardboard box, aluminum foil, plastic wrap, and tape. Line the box interior with foil as a reflector. Seal the top with transparent plastic wrap to trap heat. Place your cooking pot inside and orient towards the sun.
How To Make A Box-Type Solar Cooker?
Gather a cardboard box, aluminum foil, glue, and a clear plastic or glass cover. Line the box interior with foil as a reflector. Seal with a transparent cover to trap heat. Place the cooking pot inside on a black-colored base to absorb sunlight.
How To Make A Solar Oven Project For Kids?
Gather a pizza box, aluminum foil, plastic wrap, and black construction paper. Line the box with foil, ensuring sunlight reflects inward. Cover the opening with plastic for insulation. Place the black paper inside as the absorption surface. Direct the box towards the sun, and your solar oven is ready.
Conclusion
Building your solar cooker from a simple shoebox is both rewarding and eco-friendly. Embrace this sustainable cooking method and save on energy costs. Share your experience and inspire others. Ready to harness solar power? Your next sunny day awaits – happy cooking!